
The Horus Heresy - Painting Custodes with King Fluff's Gold Recipe
Hey guys, King Fluff here with a little update for my Talons of the Emperor force.
I get lots of people ask at events and such how I do my golden armour and as such I thought I'd take the opportunity to do a step by step account of the process as I'm currently painting up a few additional Custodes for an event.
In this instance I'm painting Sagittarum Guard, As these guys are mostly gold I thought it would be a good example to use.
STEP 1: Build and prep your model as normal - for these guys it was fine to build them in their entirety as accessing small details behind build sections wasn't going to be an issue.
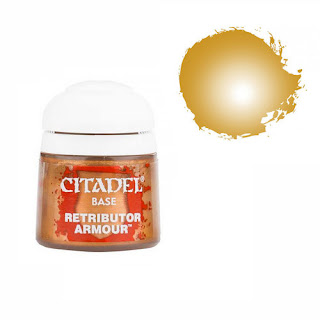
STEP 2: Priming and base coat. For these particular models these steps are one and the same. I used Retributor Armour spray paint from Games Workshop for the base gold colour. I love rattle cans, and use them extensively on models and scenery, once you get proficient in their use they can do some of the same things an airbrush can. I tend to spray models in several passes, spraying around the model as it stands to do all the side elements, spraying top down and then laying the model down to 'up' spray the details from underneath. I've found that the elimination of primer for infantry sized models is fine but on larger models like vehicles the spray can separate slightly so I would recommend laying down a primer on these first - I tend to use Halford's grey primer on all my models.
STEP 3: Washing. The gold requires shading so I do this in two stages, firstly a wash of Reikland Fleshshade (gloss) from Games Workshop adds some definition to the plates, once this is dry I add the second wash of Druchi Violet also from Games Workshop. This layer adds a depth and contrasting colour to the armour. You'll notice at this point the armour looks pretty dark but fear not that's due to change with the next layering phases.
STEP 4: Layering. For this stage I use a half way point between dry brushing and layering - as it's not quite either technique let's call it wet brushing. I use the following colours in this order; Auric Armour Gold - layer (Games Workshop), Necron Compound - dry (Games Workshop) and a final layer of Relictor Gold - air (Games Workshop).
The Auric Armour Gold brings the majority of the armour back to a gloss gold, whilst leaving the recesses the darker gold colour.
The Necron Compound is a heavy layer - this adds the highlight to the armour, this will look odd until the next layer.
And that is pretty much it - you may find that going in to certain areas with Agrax Earthshade (Games Workshop) to darken the gold may be useful (I do this on the shield wings of the Sentinel Guard) but this can be built up to taste or to differentiate different areas of gold on a model.

Obviously with Custodes there are other silver metal areas to paint, and the reds of cape and plumes etc. so if people would find these stages useful to see then drop a message in the comments below.
For now I'll leave you with my WIP Rogal Dorn who has been painted with the exact same method - proving that you don't need to spend hours on a signature piece to get a pleasing result.

Take it easy
KF
I get lots of people ask at events and such how I do my golden armour and as such I thought I'd take the opportunity to do a step by step account of the process as I'm currently painting up a few additional Custodes for an event.

In this instance I'm painting Sagittarum Guard, As these guys are mostly gold I thought it would be a good example to use.
STEP 1: Build and prep your model as normal - for these guys it was fine to build them in their entirety as accessing small details behind build sections wasn't going to be an issue.
 |
| Bare plastic and resin construction |
STEP 2: Priming and base coat. For these particular models these steps are one and the same. I used Retributor Armour spray paint from Games Workshop for the base gold colour. I love rattle cans, and use them extensively on models and scenery, once you get proficient in their use they can do some of the same things an airbrush can. I tend to spray models in several passes, spraying around the model as it stands to do all the side elements, spraying top down and then laying the model down to 'up' spray the details from underneath. I've found that the elimination of primer for infantry sized models is fine but on larger models like vehicles the spray can separate slightly so I would recommend laying down a primer on these first - I tend to use Halford's grey primer on all my models.
 |
| Gold Sprayed (left) vs Washed in Reikland Fleshshade Gloss (right) |
 |
| Washed in Reikland Fleshshade Gloss (left) vs Additional wash with Druchi Violet (right) |
STEP 4: Layering. For this stage I use a half way point between dry brushing and layering - as it's not quite either technique let's call it wet brushing. I use the following colours in this order; Auric Armour Gold - layer (Games Workshop), Necron Compound - dry (Games Workshop) and a final layer of Relictor Gold - air (Games Workshop).
The Auric Armour Gold brings the majority of the armour back to a gloss gold, whilst leaving the recesses the darker gold colour.
 |
| Auric Armour Gold layer (right) |
 |
| Necron Compound layer (left) |
Once the silver is dry you can add the Relictor Gold - now it's important to note that I'm using the air variety here, being much thinner it acts more like a glaze than a layer paint and in this case changes the silver back to gold and adds that golden highlight to the armour.
 |
| Relictor Gold air layer (right) |

Obviously with Custodes there are other silver metal areas to paint, and the reds of cape and plumes etc. so if people would find these stages useful to see then drop a message in the comments below.
For now I'll leave you with my WIP Rogal Dorn who has been painted with the exact same method - proving that you don't need to spend hours on a signature piece to get a pleasing result.

Take it easy
KF
excellent guide! hats off to you sir!
ReplyDeleteIt is a great little guide 👍🏻
ReplyDelete